Crochet Rubber Duck Earrings
- By Josephine Stockton
- 06 Jun, 2020
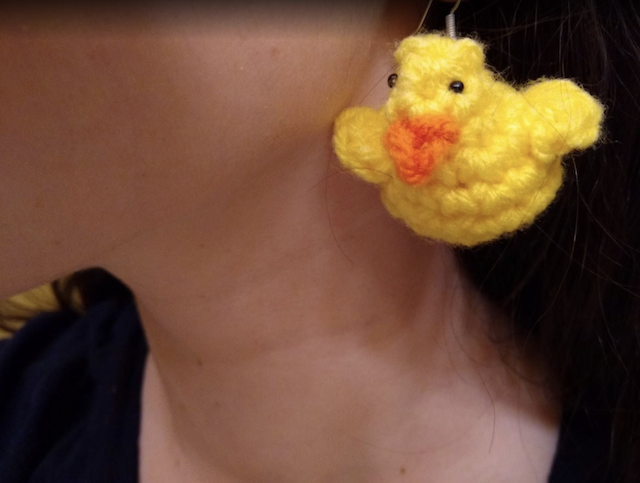
Ducks are amazing, but rubber ducks are even better! Why not wear these cute rubber ducks on your ears in crochet form? Using minimal yarn and materials, these are a great summer craft that takes only a few minutes and even fewer supplies.
In this free pattern, I will teach you how to crochet your own rubber ducks and how to turn them into delightfully cute earrings that you can wear for fun. This is a beginner level pattern and should take around 30 minutes to complete a set.
Supplies:
- Hook: 4.25mm (Size G/6)
- Yarn: Size 4 worsted weight (small amounts of yellow and orange)
- White or black thread
- 4 black seed beads
- 2 jump rings
- 2 earring hooks
- You will need scissors and jewelry pliers
Abbreviations/Stitches Used:
- MC - Magic Circle
- SC - Single Crochet
- INC - Increase
- SC2TOG - Single Crochet Decrease
- CH - Chain
- st - stitch
- sts - stitches
- slst - slip stitch
- FO - Finish Off
Pattern Notes:
This pattern will be worked in continuous rounds.
Use a stitch marker to keep track of which round you are on.
Each duck earring set will be one-of-a-kind.
Assembly instructions can be found at the end of the pattern.
Have Fun!
Step 1: Begin
Body x2:
Round 1: Start 6 SC in an MC [6]
Round 2-3 (2 rounds): SC in each st around [6]
Round 4: INC in the next 3 sts, SC in the next 3 sts [9]
Round 5: INC in the next 6 sts, SC in next 3 sts [15]
Round 6-7: SC in each st around [15]
Round 8: SC2TOG in the next 6 sts, SC in the next 3 sts [9]
Round 9: SC2TOG in the next 3 sts, slst in the next st and end thr round early.
FO, sew the hole closed and hide the end using a yarn needle
Wing x4:
Round 1: SC 4 in an MC [4]
FO, leaving a tail to sew
Beak x2:
Row 1: CH 2, turn, SK 1 st, SC in the next CH. [1]
FO leaving a tail to tie.
Step 2: Assembly and Finish
- Tie the beak to the front of the body. (The back should be where your increases are to imitate a tail.) Hide the ends within the duck.
- Sew the wings on either side of the duck. Hide the ends within the duck.
- Using the thread sew the seed beads on as eyes on and above either side of the beak.
- Using pliers open the jump ring and guide it behind a stitch on the back of the duck’s neck.
- Place the earring hook on the jump ring, with the needle end facing the back of the duck.
- Close the jump ring with the pliers.
CONGRATS! You now have your very own crocheted rubber duck earring pair. Feel free to send me pictures, I’d love to see!

